RUBY SAPPHIRE POS/S2k Setup
The Ruby-Sapphire requires a different setup as shown below:
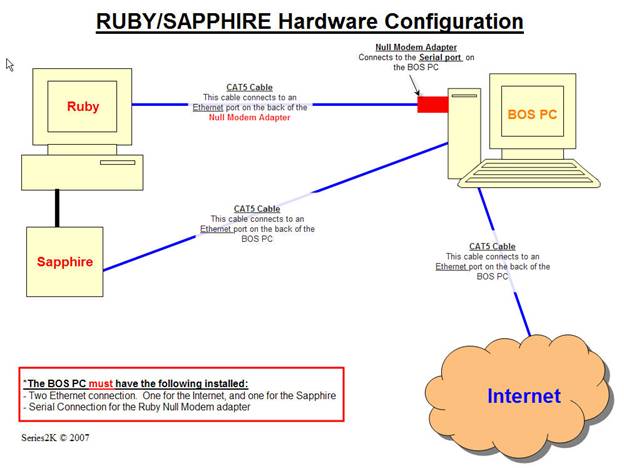
The significant difference is the fact that we are using 2 separate connections, one a regular EXTRA net work card card connected to the router on the Sapphire and a standard serial connection using the special Null Modem connector on the PC to the Ruby Master Port (normally port 5 but run a configuration report to verify the Back Office location and connect accordingly)
Downloads:
From the S2k web site download both the Regular Ruby install and the Sapphire install and run the 3 MSI/EXE install programs in the Sapphire zip folder and default to their standard locations. When you download the regular Ruby zip file all you need are the /Ruby directory and /Temp directory and copy those to /Series2000/Data/S2knet directory as usual.
After Connection:
Once all of this is installed you should have access to a Gemcom folder:
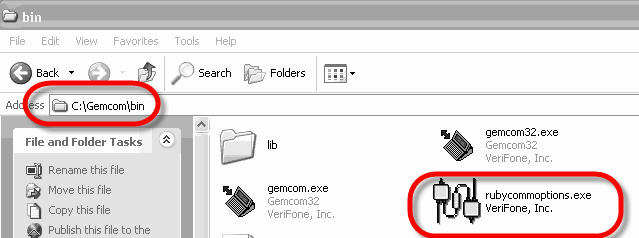
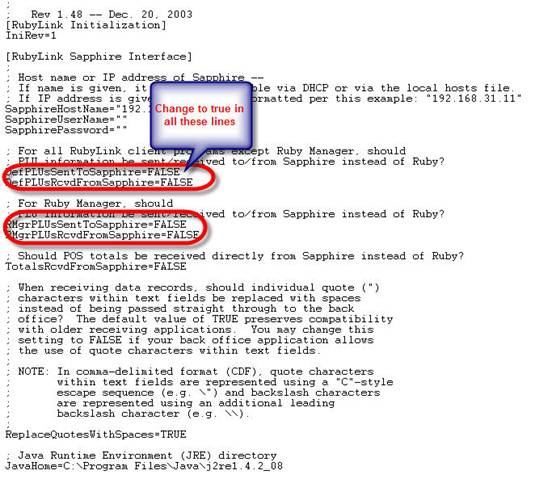
Inside the C:\Gemcom\bin there is an .ini file and this should be edited as shown below and saved:
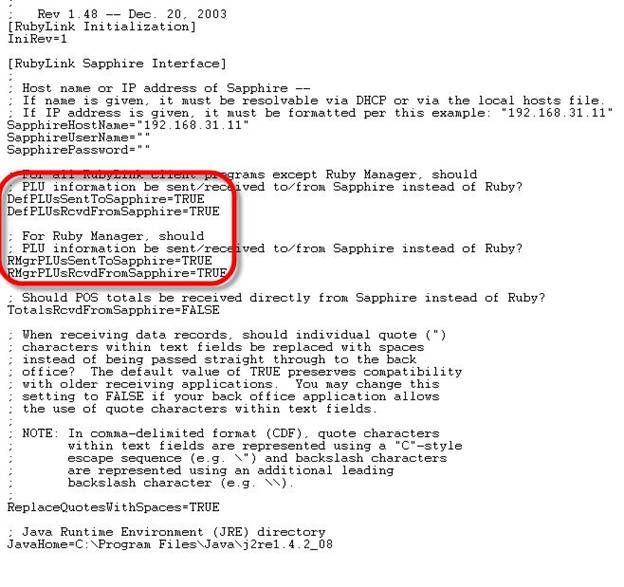
And should look as follows and then saved:
And then run the rubycommoptions.exe and you will see this screen:
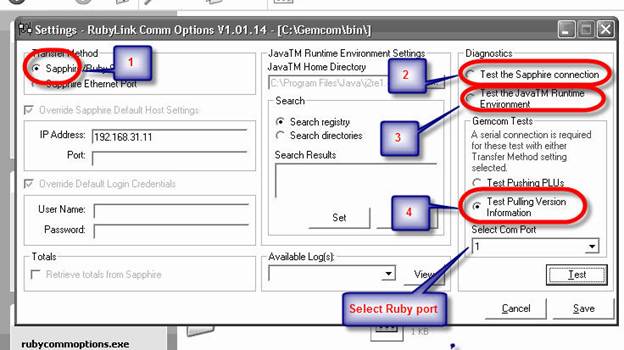
And then test each type of Diagnostics as shown above, pressing he test button on each test. This should give a successful test result after each one. If any errors occur note and then tech support will need to be contacted. Make a note of any error messages and contact the Ruby Help Desk.
loans loans loans loans loans loans loans loans loans loans loans loans loans loans loans loans loans loans loans loans loans loans loans loans loans loans loans loans loans loans loans loans loansloans loans loans loans loans loans loans insurance insurance mortgage mortgage